The screening process with Sterling or any 3rd Party background service is very similar. Because we are not dealing with real time updates to our system the method involves more manual effort on the part of the EZVolunteer Admin responsible for background checks.
To begin, you will need to decide how frequently you wish to submit or export your list for screening. This varies by district policy and may also differ depending on the time of the school year. Typically batches are created/submitted either daily or weekly.
To create a batch of volunteers start by signing into the administration console and going to Utilities > EZVolunteer > Background Screening. Then follow these steps -
-
From the background list page choose Create New List
-
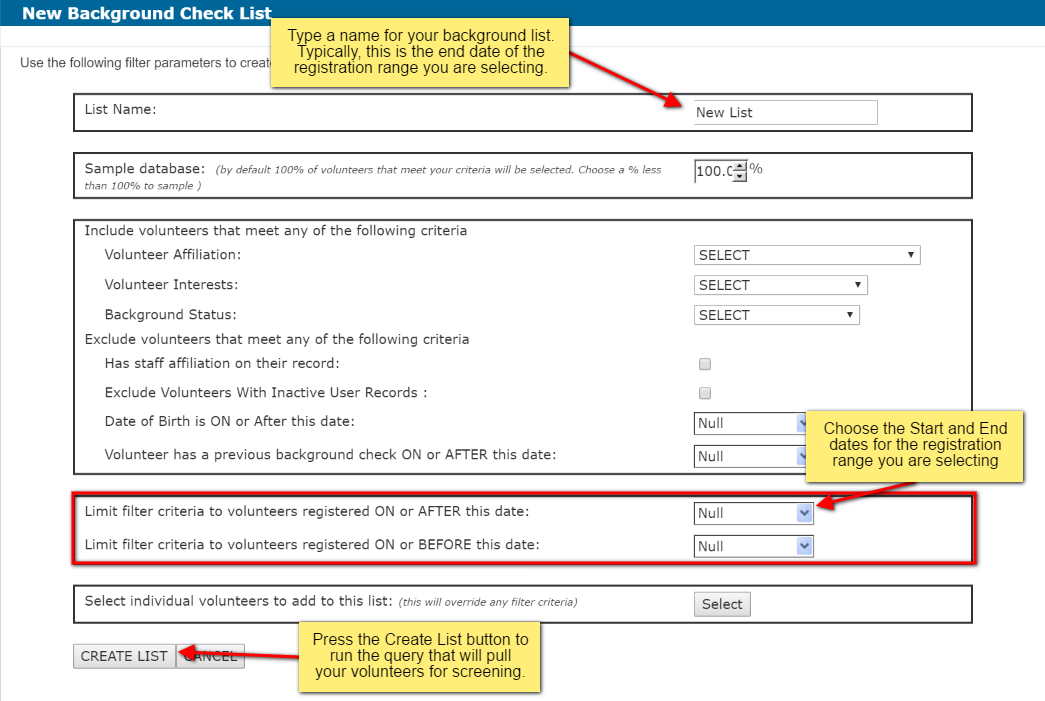
On the New List page type the name of the list. Typically this is the date of the batch you are creating (eg. May 5, 2016)
-
In the section for Registration Date, choose the On or After Date for the beginning of the time period you want volunteers and the On or Before Date for the end of the time period. (for example, On or After May 1, 2016 and On or Before May 5, 2016).
-
Press the Create List button
-
This will display the records of volunteers to be added to your batch, then choose Back to save your list and return to the background list page.
If you are using the Sterling Integration, press the Check button for the list you wish to submit. This will submit the list to Sterling. As results come back you will see on your background list page the ‘Logged’ number increasing until it equals the ‘Count’ number.
To view the status of a volunteer’s record click on the specific background check list name. You will see either Green (OK - Standard), Beige (Pending) or Yellow (Review) status on the volunteer records processed by Sterling.
You will need to login to the Sterling system to evaluate the results for any Pending or Review volunteers.
If you decide the results would still allow the volunteer to be approved then you return to the specific background check list page, select the record of the volunteer whose background is Yellow or Beige and use the ‘Select A Result’ menu to change their status to Green (OK - Standard).
If you decide to not allow the volunteer to work in your schools, then on the specific background check list page you would select the volunteer’s record and set their Result to Red (Not OK).
If you are using 3rd Party Screening, press the EXPORT link to generate a Comma Separated Value (CSV) file of your volunteers with the background details that we have for them.
When you get results back from your 3rd party service, go the specific background check list page and select the records that are Approved and use the ‘Select A Result’ menu to set them to Green (OK - Standard) status, or Red (Not OK) status.
Below is an example of the Create List page when you are selecting volunteers to submit for Sterling or 3rd Party Screening.